Loading RadCardTM:
Loading images data on RadCard is achieved in two ways.
1) RadCard™ “on board” load application at hospital/clinic
RadQR™ application loaded on PACS network:
RadQR™ will be the process that most Radiology practices will use to load image data onto the RadCard™. RadQR™ has powerful functionality to search, select (including multiple studies), validate patient identity and load images onto RadCard™.
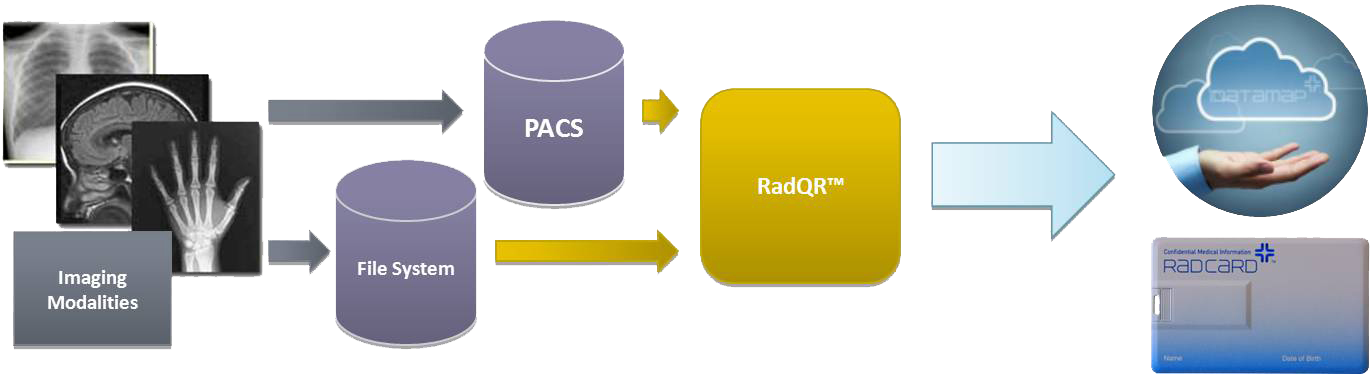
iDataMap’s RadQR™ platform provides a powerful connectivity gateway to large scale PACS and radiology file systems. RadQR™– Radiology Query Request – integrates PACS connectivity with cloud-synchronisation capabilities and Radiology Information System (RIS) report extraction via DICOM and HL7 protocols. The result is a suite of search functionality for locating and extracting patient records within a healthcare system.
Although RadCard™ is completely self-contained and can pull imaging data from a local system, the RadQR™ package is more efficient, offers seamless integration with the radiology workflow and allows much greater connection and search capabilities across medical environments allowing for a universal adoption.
RadQR™ has been designed to comply with industry standard, compliant DICOM commands. This simplifies the connectivity between RadCard™ and any number of different vendors’ imaging machines or PACS environments and ensures a consistent hospital implementation process for the installers. In addition to this, RadQR™ is the portal for accessing radiological reports.
iDataMap Corporation’s unique RadQR™ application augments the industry’s varied and different networks, creating a total solution for transferring imaging studies and associated reports from the radiology PACS systems to RadCard™.
RadQR™ supports remote report extraction and synchronisation with the RadCard™ primary record through cloud-based services, and has an SMS-based patient notification system if required.
RadQR™ requires the installation onto a workstation on the PACS network.
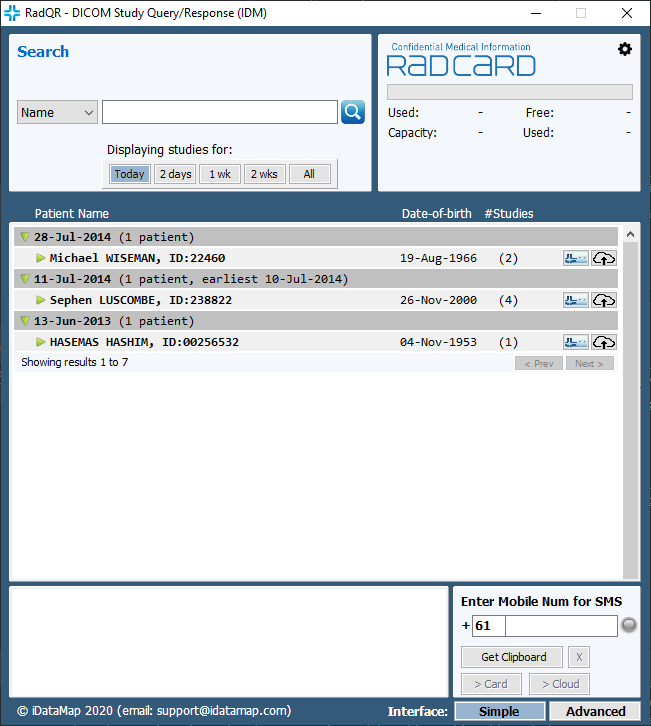
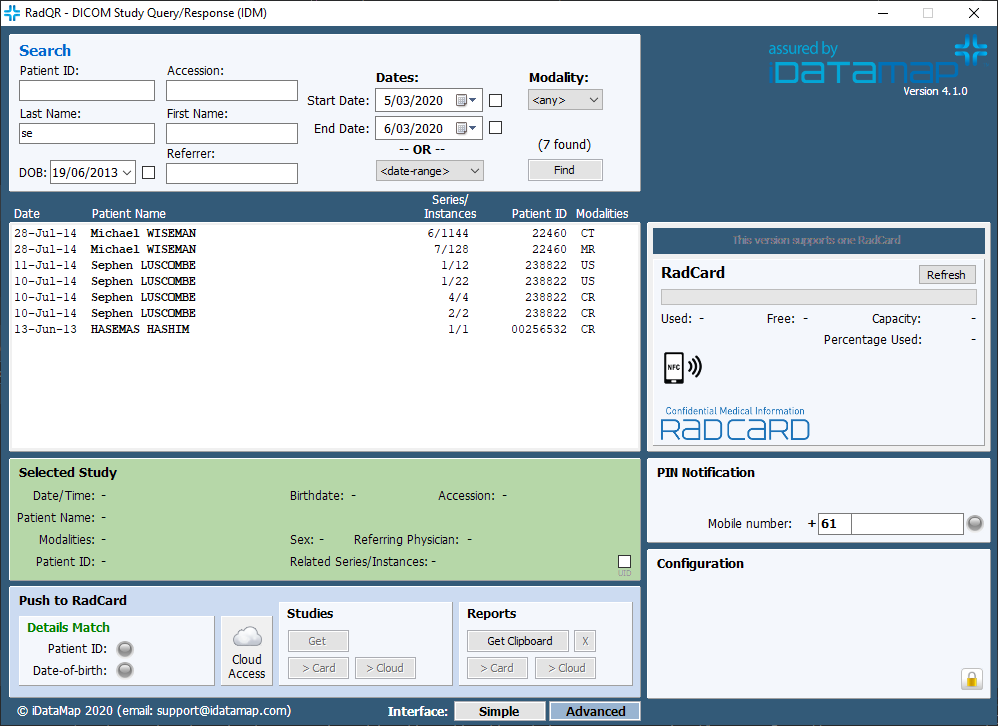
RadQR™ searches the PACS or file system for the desired DICOM images. Powerful search capabilities ensure patient records are quickly located.
Selected studies can then be extracted (both DICOM image studies and their corresponding radiology reports) and channelled to RadCard™ and/or iDataMap’s cloud-based repositories. RadQR™ will be the process that most Radiology practices will use to load image data onto the RadCard™. RadQR™ has powerful functionality to search, select (including multiple studies), validate patient identify and load images onto RadCard™. RadQR™ requires the installation of the software application onto the PACS network. Contact the Distributors in your location to arrange installation and training.
** Further instructions on this page relate to the situation where RadQR™ is not being used as the loading application.**
Opening RadCardTM – Adding/Viewing Data
Adding data to a new (empty) RadCard™:
• Insert RadCard™ into the USB Port of your Computer.
• The AutoRun system will usually launch the RadCard application.
NOTE: If your system administrator has disabled the AutoRun feature in Windows, ask them to re-enable it. Otherwise manually launch RadCard™.
• Navigate to your computer’s CD Drive labelled “RadCard Autorun”
• Double-click “run.cmd”
![]() • RadCard™ will start
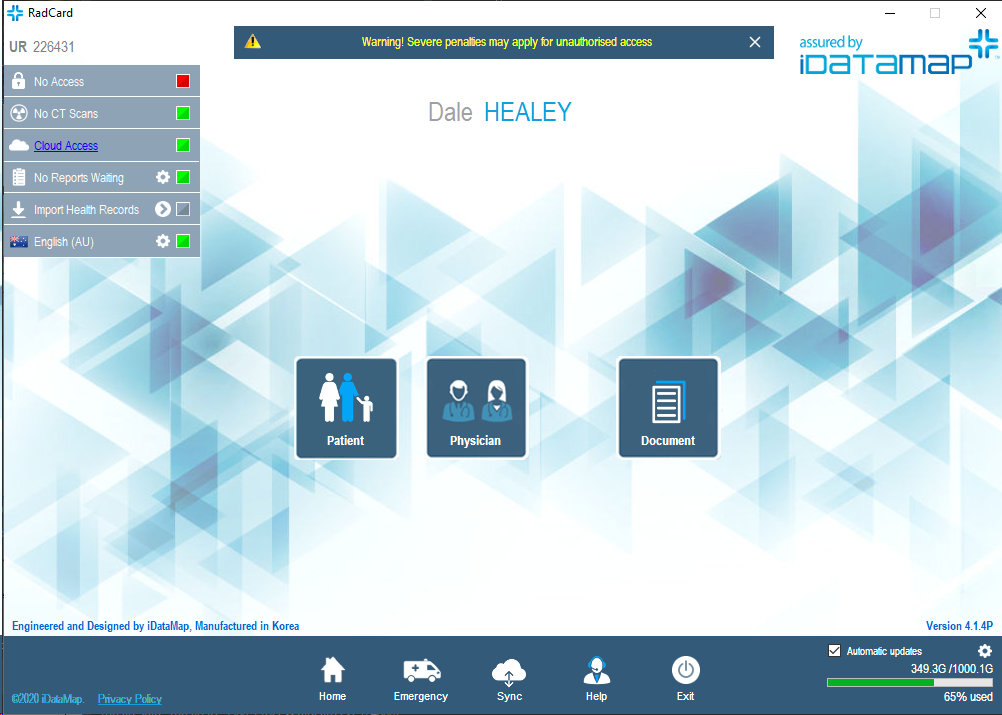
• RadCard™ will start
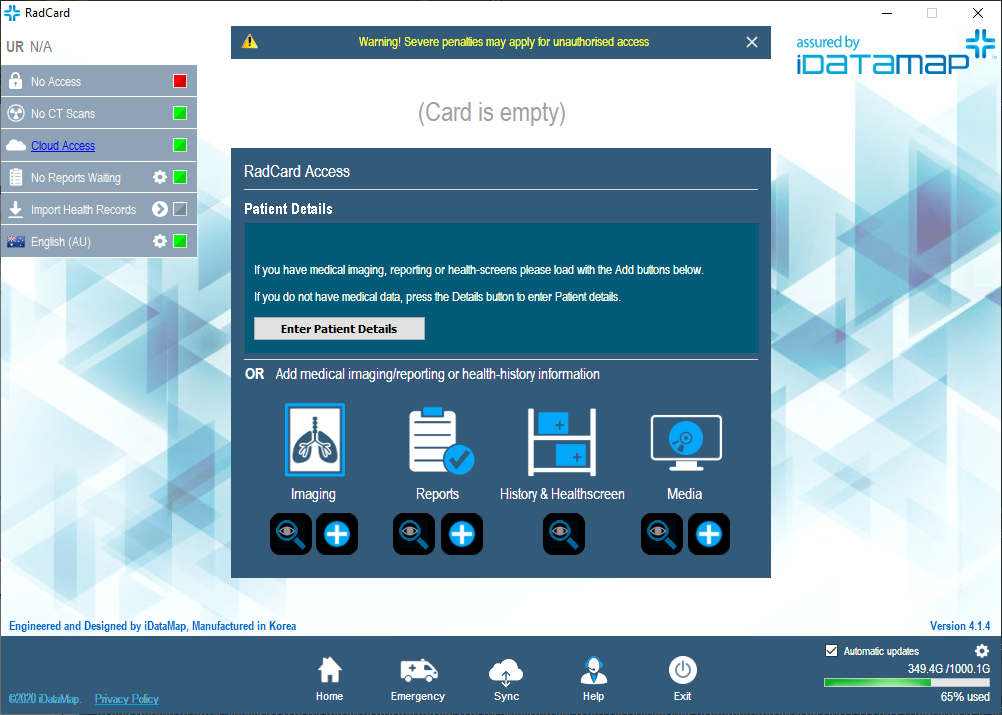
• New RadCards will display the RadCard Access Home Page.
Press the appropriate Add “+” button (Images – DICOM, Reports, Video)
• This launches a standard Windows file-selection dialog. Find / select required files – all DICOM compatible imaging will be loaded.
• Click “Open” and the files will be loaded onto RadCard™.
• When creating RadCard™, you will be prompted to print the patient’s PIN number. Please ask the patient to store their PIN in a safe place.
B. Adding additional data to an already populated RadCard™ / Login to Existing Patient RadCard™
• Insert RadCard™ into the USB Port of your Computer.
• The AutoRun system will usually launch the Start Screen.
NOTE: If your system administrator has disabled the AutoRun feature of Windows, ask them to re-enable it. Otherwise manually launch RadCard™.
• Navigate to your computer’s CD Drive labelled “RadCard Autorun”
• Double-click “run.cmd”
![]() • RadCard™ will start
• RadCard™ will start
Where RadCard is populated with patient information or imaging, the log-in screen appears that requiring either a patient login or medical practitioner login (as below). Where the version of RadCard has a trailing “P” – Patient Access, RadCard allows addition of medical imaging and reporting by any RadCard user – the non-“P”, or standard version requires a medical practitioners provider number and provider PIN.
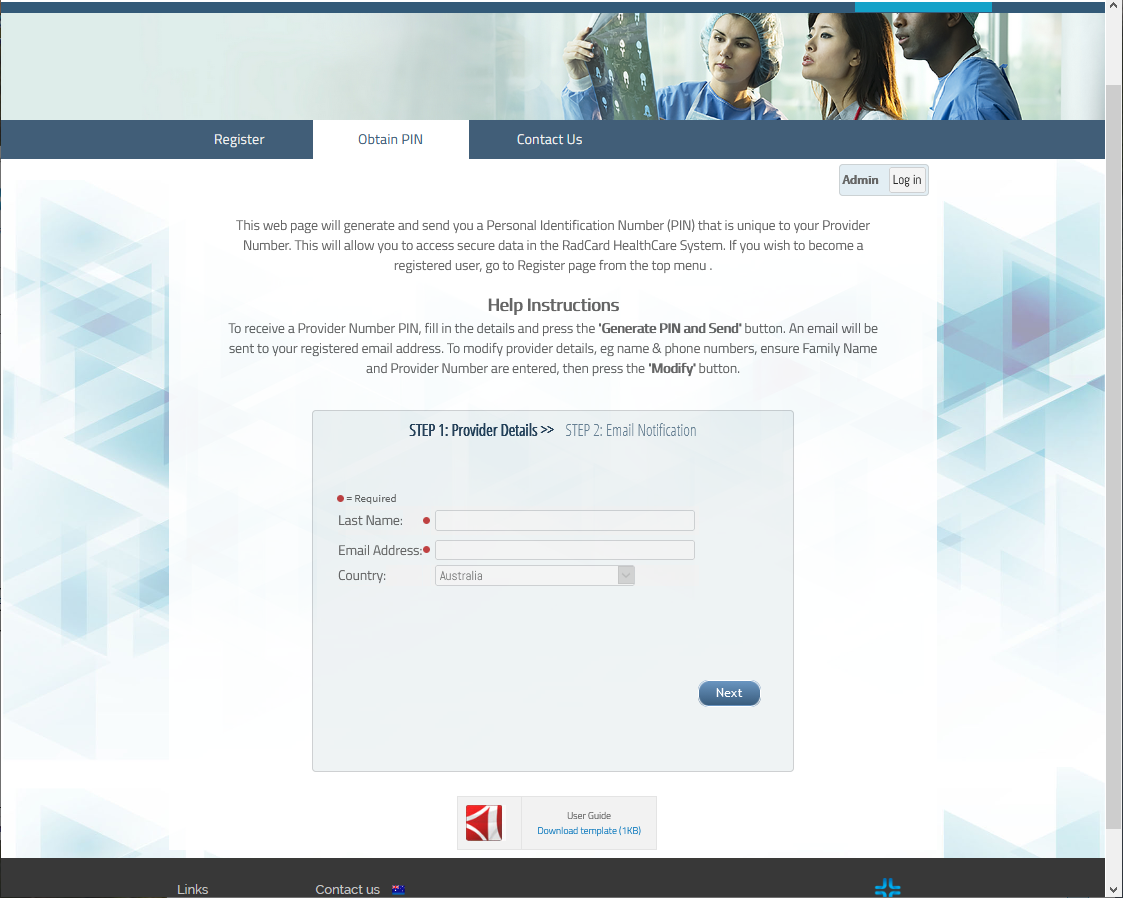
To add medical information as a medical practitioner you will need to be a registered user though the ProviderPIN security system (http://provider.idatamap.com/provider). This system gives you access via a user name and PIN. Once a card is loaded with a patient’s details, the patient can view (but not change) the information using their own PIN.
For Physicians, there are two levels of access:
Referring Physician – can view all information on card (except confidential medical section) and add medical information, but not add or modify imaging data.
Imaging Provider – in addition to above, can add and modify imaging data.
Referring and Imaging provider PINs will be different for each provider’s provider number.
Once you are “logged-in” to RadCard, press the “+” button for imaging. RadCard will then oresent you with a load dialog. Navigate to the study of interest and press Ok.
Note: If the operator attempts to subsequently load files belonging to another patient RadCard™ then prompts for confirmation (allowing operators to override typographical errors in the new DICOM file details). This prompt protects the institution from accidental patient confidentiality breaches and loading more than one patient onto the same card.

